So, I was creepily scouring peoples’ Facebook pictures the other day and I realized that sooo many people were getting out in the world and doing fun, autumny things. Quite a few people were visiting farms and picking their own pumpkins and what not and while my outdoorsy-ness really does only extend to watching my man rake the leaves from the safety of our deck, I got super jealous that I wasn’t a part of all of these corn maze-ing, pumpkin-picking, hay bale-ing good times. So, while I was at the liquor store I figured I’d take a short jaunt over to Sobey’s and pluck myself up a nice ripe pumpy and have a little carve-fest date with my dearest. While he’s all about date night, he knows his place– he leaves the crafting business up to me. So he played a marvelous game of Call of Duty, and plied me with praise and alcohol (don’t tell me that’s not love), while I whipped up a Halloween wonder in the form of Cinderella’s carriage.
Step one:
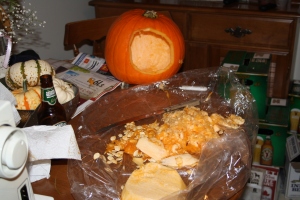
Punch a hole in that sucker. Most Jack-o’-Lanterns have their access holes on top around the stem, but I put one in the back so my wee carriage will look sleek. So many people have asked me how I managed to carve it without putting a hole in it. I said: Magic. That’s not me being clever, that is me being saucy.
Step 2:
Scoop out your pumpkin. A lot of people call the “stuff” pulp. However, if you look in the trusty Bitchionary you’ll see it’s actually called “punkin guts”. This part is tedious. so I recommend cracking open a cold one to help you get through it. Sigh.
Step 3:
Next I decided to have a door and some windows installed. You don’t have to print off the MS Paint blueprints I’ve attached to the bottom of the page, I assume you know how to draw an oval. But I do recommend making a little paper stencil for yourself first so your shapes don’t look wonky and mismatched.
 If you want to be a fancy pants you can add a tiny working door on your carriage. Just take the oval you cut out for your doorway, chop it in half and use some wire (or unbent paperclips if you’re going to be resourceful about it) and make teeny tiny hinges. Shape one paper clip like a “U” and drive it into the pumpkin wall, then use a second paper clip and thread it trough your first one, then drive it’s prongs into the door. Give the prongs a little twisty-twisty business so they’ll hold in place, and ba-blam! You got yourself a door. If Peter Peter Pumpkin Eater ever comes looking to buy a house for his missus, I’ve got myself a new gig.

Step 4:
Take your little creation into the back yard and and give a good coating of silver metallic spray paint. I got mine at Michael’s, or as I like to call it, my happy place. It cost me about 5 bucks and it dries in a nanosecond which is extremely convenient if you’re impatient like me, however it’s extremely inconvenient if you’re the poor little caterpillar that got a thick coating of silver paint in my garden. I’ve really got my fingers crossed that he’ll turn into a beautiful, silver butterfly instead of the more probable fate of a beautiful, silver caterpillar-corpse.
Step 5:
The last step is really just adding all your fixin’s. I made some swirls with plain old Elmer’s craft glue and sprinkled on some glitter. I used Sterling and Crystal Fine from the Martha Stewart 24 vial glitter multi-pack. You can use any old sparkles you’ve got lying around the house, I just consider myself a bit of a glitter snob.
I also added some wooden horses that I had crafted up for a Christmas project. If you want to try your hand and painting them you can get them for about a buck-fiddy each at Michael’s (mmm, happy happy happy). Although the carriage looks swell without them. Again, I added some Christmas ribbon but it’s not necessary if you don’t want to be at it.
Lastly I found some wire lying around the house and I wrapped it around a beer bottle a couple times to make curly wheels and just jammed their little pointy ends into the pumpkin to keep them fixed in place. Glue on some fake moss (or real moss if you’re the type of person who likes to go foraging for your craft supplies).
There, now your ready to go to the ball. Or kegger, whatever you’re into, really.
Song of the Day:


