I know that mustaches have been on the rise in popularity as of late, and while I love a good donut-duster, it just doesn’t cut it for me in the way of facial fur.
Think of all the truly fascinating bearded men throughout history: Shakespeare, Hemingway, Abraham Lincoln, Zeus, Aragorn, Papa Smurf, Colonel Sanders, etc. How could one not want to join the ranks of such greatness? Being a lady, however, well… you can see the problem. I have nothing to stroke when I need to concentrate and I have a perpetually chilly chin in those cold winter months. Scrolling through Pinterest one day I came across a picture of a girl who crafts and sells woolen beards on Etsy. I seriously considered ignoring my relentless decent into poverty just because I wanted one so friggin’ bad. However, the moths that were living in my wallet pleaded with me in their tiny, pathetic voices “Please, Crafty Bitch, don’t take away what little insulation we have left”. Rather than condemn the poor buggers to a sticky bout of hypothermia, I picked through my very fancy, handy-dandy crafting kit (aka, Sobey’s bag filled with sparkles and shit) and fashioned myself some wooly whiskers of my very own.
Yer Bits and Bobs
1. Felt: Pretty much use any kind of fabric you like, I chose felt because I wanted something a little bit sturdy so it wouldn’t go droopy should my beard turn out heavier than I had anticipated.
2. Wool: Any colour wool your wee ticker may desire, I went with traditional hair colour that matches my own. There’s a joke in here somewhere about carpets matching drapes and only having hard wood.
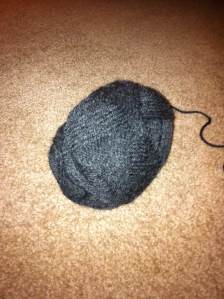
This Craft takes Balls… of Yarn.
3. A needle and thread: but of course.
4. Two hair elastics
Instructions
Step 1- Trace Yo’ Face
If you have a friend or a boyfriend who’s not used to your all of your eccentricities yet, I would recommend giving them a jingle and asking them to come over to help you with this step—it’ll be a dandy little crash course into how frickin’ awesome you can be. My experience went a little bit like this:
Crafty Bitch: “Here, I’ll just hold this felt up to my face, and you, like, trace out around my nose and chin. Then feel where my lips are with your fingers and trace around those too.”
Boyfriend: “This is so weird. You are so bizarre. What are we doing this for, again?”
Crafty Bitch: “I told you, I need it to make my fake beard! Do you want to eat the macaroni and cheese I made, or not? Now quit your yammering and do it!”
Boyfriend: “Oh yes, your fake beard, how could I forget. Hold still, I’ll get a sharpie. Christ.”
Ah, Amore ❤
You’ll end up with something that should be shaped like this:

Step 2- Knot a Thang
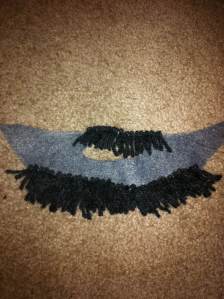
Ok, your next step is tedious. In fact, this entire craft is, for the most part, tedious—it’s not a craft for the faint of heart. This is a man’s man kind of craft, it’ll put hair on your chest… er, face. You’ll have to cut your whiskers. Each one will be about 3 inches long. It can be a little hard to estimate exactly how many whiskers you’ll need as it’s contingent on that mug of yours, but it’s safe to say that by the time you have enough it’ll feel like you’ve cut 1 kajabillion (real numbers are for nerds). Then you’ll take at your little mountain of wooly bits and knot them all, right in the centre of each individual little sucker. These knots will act as anchors for your next step.
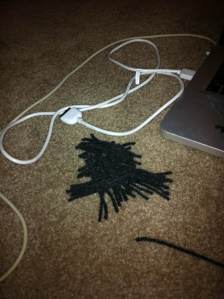
A pile o’ whiskers

My terrible drawing of a knotted piece of wool.
Step 3- Sew What?
Now, there’s probably an easier way to go about this, with a sewing machine, but I like to keep my hands busy while I’m getting my weekly helping of The Walking Dead, so I figured I’d hand-sew them. Fold the whisker at the knot in the centre, make one little stitch across the two strands, just below the knot, and then one right through the knot just to keep it secure.

It’s important to remember to evenly space your whiskers apart, if you just sew them in willy-nilly you’ll have some patchy business going on.
Just keep sewing, just keep sewing
Step 4- Fix it to yer Face
So, Now that you’ve got your lovely little beard all finish you’ll have to fasten to your face. I had a big pack of hair elastics kicking around so I used one on each side. I sewed them to the corners of my beard and gave it a try-on. It was a little loose so I just pulled down the corner of the hair elastic and sewed that down as well, making the loop smaller. It took a few attempts to get the right fit, but now it’s as comfy as if I grew it myself.

Dandy Ear-Loops
Step 5- Sit Back and Bask in the Glory of your Manliness

A face full of scowl